Quick start#
This walks through a first config, a first run, and how to read the UI. It assumes micromux is installed.
1. Write a config#
micromux looks for one of micromux.yaml, .micromux.yaml, micromux.yml, or .micromux.yml in the current directory. Create one describing your services:
# yaml-language-server: $schema=https://github.com/romnn/micromux/raw/main/micromux.schema.json
version: "1"
restart: unless-stopped
services:
  api:
    command: ["sh", "-c", "./run-api"]
    env_file: ".env"
    ports: [8080]
    healthcheck:
      test: ["CMD-SHELL", "curl -fsS http://localhost:8080/health || exit 1"]

  worker:
    command: "./run-worker"
    depends_on:
      - name: api
        condition: healthy
The $schema comment turns on completion and validation in editors with the YAML language server. Each service needs a command; everything else is optional. See Configuration for the full set of fields.
2. Run it#
From the directory containing the config:
micromuxOr point at a config explicitly:
micromux --config ./micromux.yamlmicromux starts every enabled service, honoring depends_on — here worker waits until api reports healthy — and opens the TUI.
3. Read the UI#
The sidebar lists your services; each row shows its lifecycle state. Selecting a service shows its live log output in the main pane.

Move with j/k (or the arrow keys), restart the selected service with r, and toggle it disabled with d. When a healthcheck is failing, open the healthcheck pane with H to see the probe command and its output:
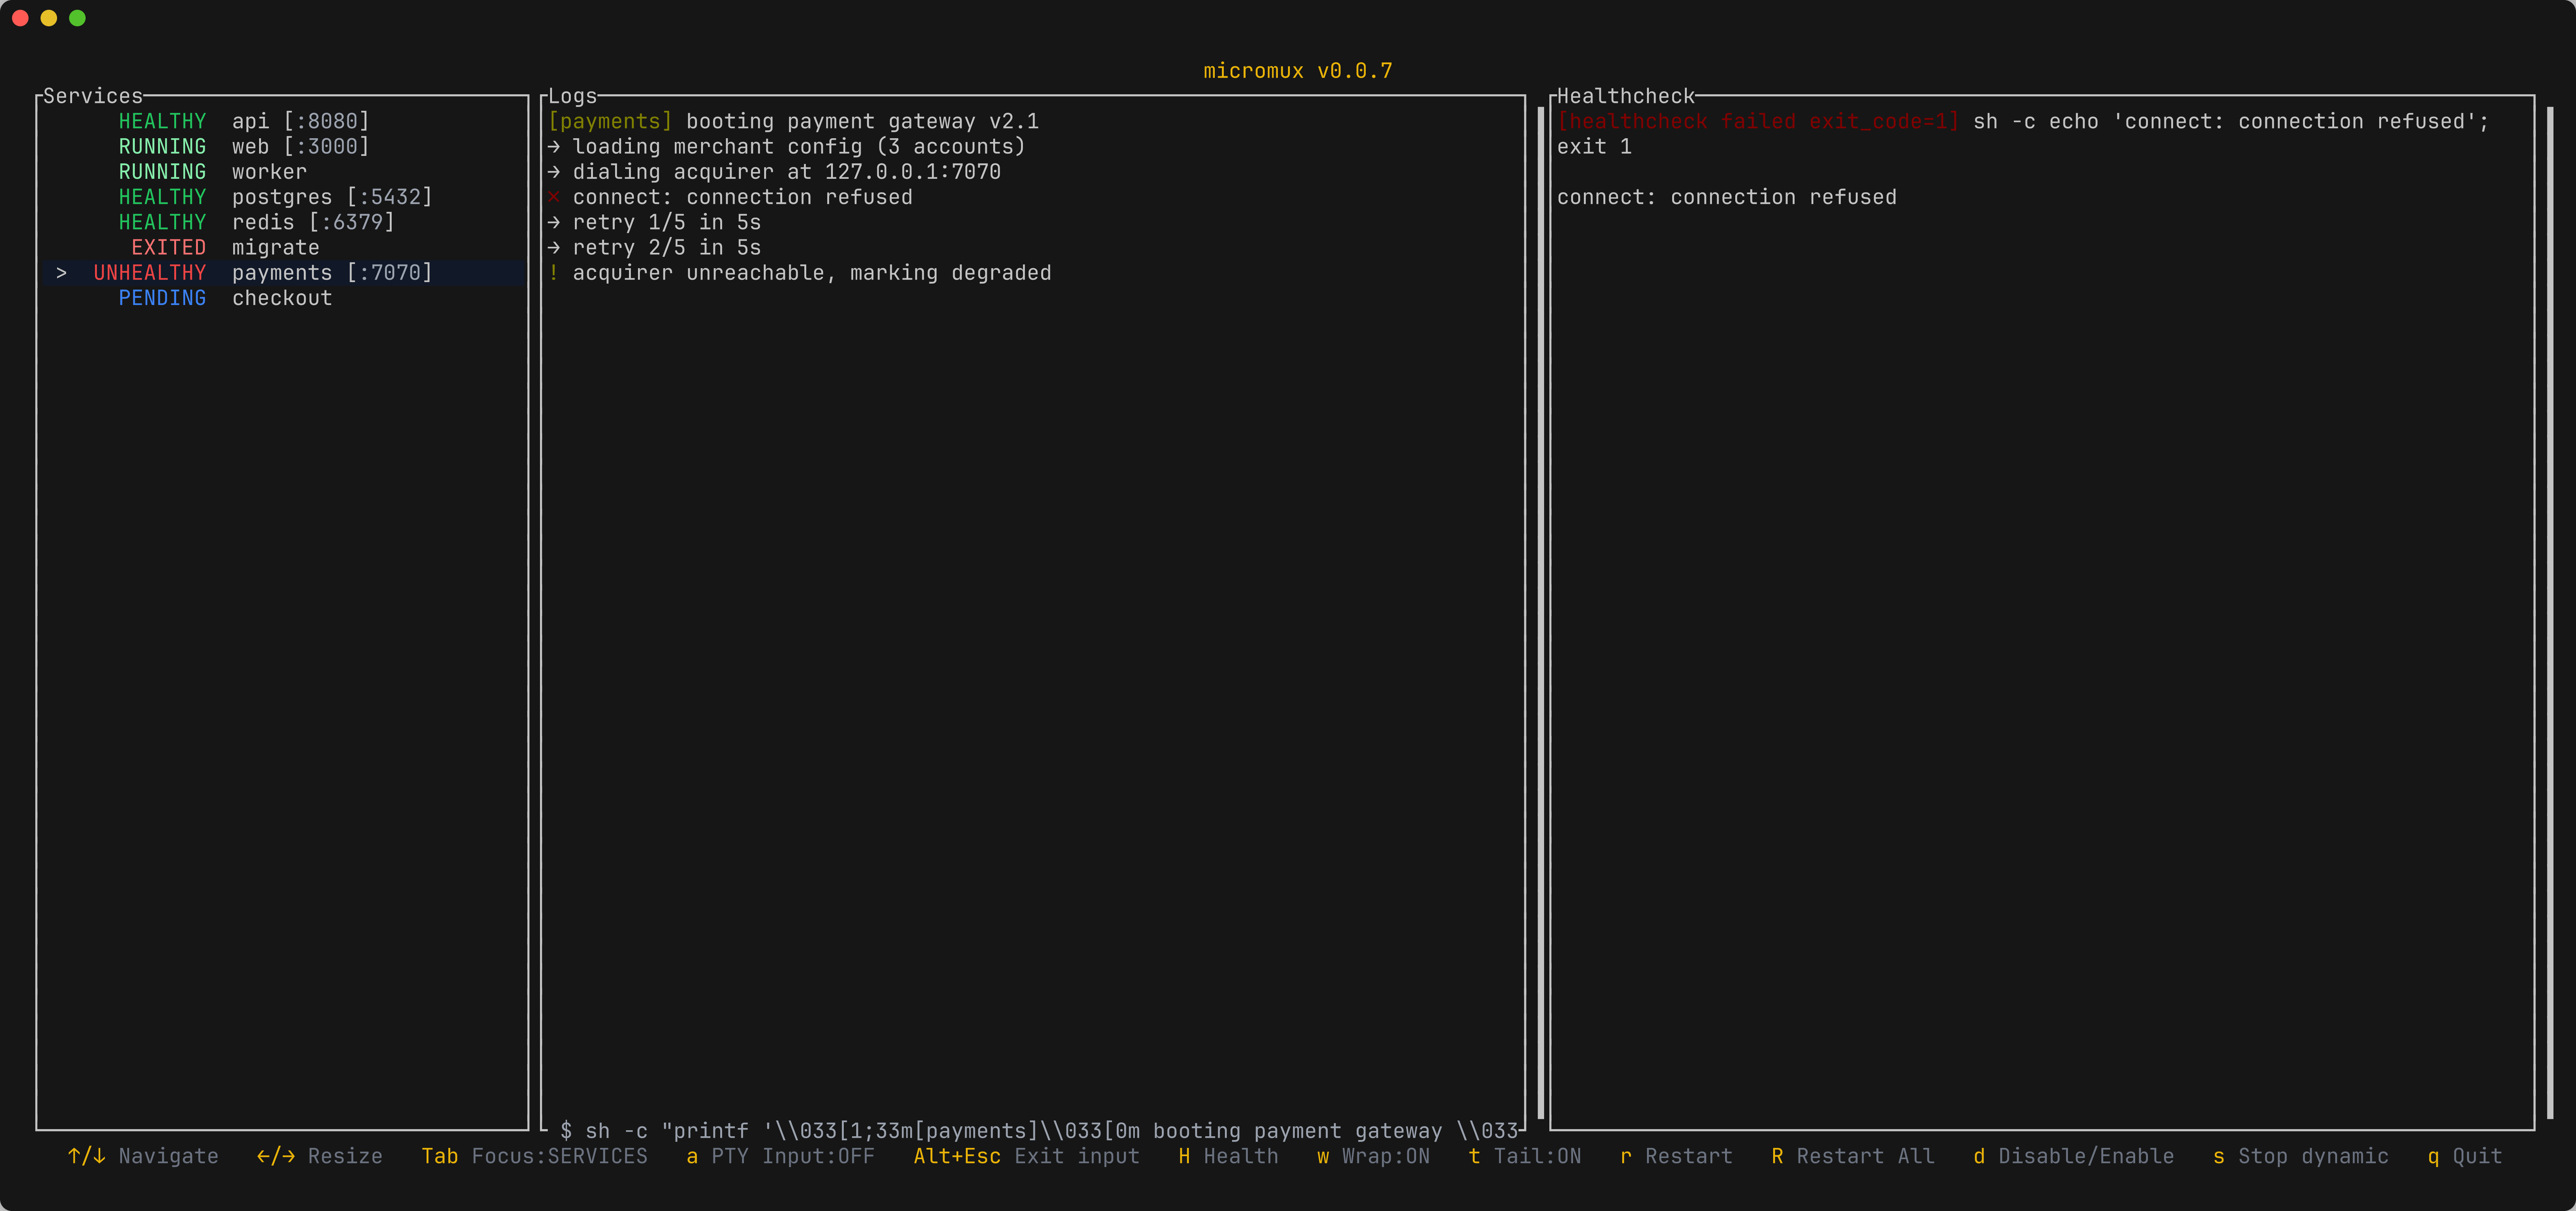
The full set of keys and panes is in The terminal UI.
4. Steer from the shell#
Every running session also exposes a local control plane, so you can inspect and steer it without touching the TUI — handy in a second terminal or a script:
$ micromux ctl ls

api                  id=api origin=configured desired=Enabled execution=Running health=Healthy generation=1
web                  id=web origin=configured desired=Enabled execution=Running health=- generation=1
worker               id=worker origin=configured desired=Enabled execution=Running health=- generation=1
postgres             id=postgres origin=configured desired=Enabled execution=Running health=Healthy generation=1
redis                id=redis origin=configured desired=Enabled execution=Running health=Healthy generation=1
migrate              id=migrate origin=configured desired=Enabled execution=Exited health=- generation=1
payments             id=payments origin=configured desired=Enabled execution=Running health=Unhealthy generation=1
checkout             id=checkout origin=configured desired=Enabled execution=Pending health=- generation=0
micromux ctl restart api # restart a service (respecting dependencies + health)
micromux ctl logs api --tail 50
micromux ctl health payments # why is a probe failing?This is the same control plane coding agents use over MCP.
5. Leave a service off at start#
Set disabled: true to keep a service disabled when the session starts; enable it later from the TUI (d) or with micromux ctl enable <service>:
services:
  worker:
    command: "./run-worker"
    disabled: true
Next steps#
- Configuration — dependencies, healthchecks, restart policies, and logs in depth.
- The terminal UI — every key and pane, plus attaching to a running session.
- Agent control — let Claude Code or Codex drive the stack.